You’ve mastered Dutch Oven Bread, No Knead Dutch Oven Bread, and even our newest Basic Bread Oven Bread recipes. Now you want to tackle sourdough and other naturally leavened breads. But where do you start? Naturally leavened baked goods rely on a starter to rise them and create the creamy, flavorful interior and crispy crust we all know and love. But creating a starter can seem intimidating - while baking is often considered a science, establishing and using a starter for baking is not that exact.
So we turned to world-renowned bread expert Chad Robertson of Tartine Bakery for his best tips on how to get started with starters, sourdough and other naturally leavened baked goods. His latest book, Bread Book, walks you through the steps of creating a starter, and then how to use it to bake his legendary recipes – from bread to buns, and even tortillas and pasta. Chad demystifies this ancient technique so that anyone can feel confident making and using a starter to bake like the experts at home.
Note that this is merely a basic introduction to starting to work with a starter and sourdough, and we highly encourage you to seek out Chad’s book for a much more thorough discussion on the topic.
Shop the Bread Oven Get Bread Book
Why Use a Starter for Baking?
“Establishing a starter from scratch is fairly straightforward.” Natural yeast and micro-organisms exist in the air around us, in the flour already in your pantry, and even on your hands. You just need to create the right environment for them to prosper, grow and flourish. There are many different methods and ways to create a starter, and every baker has their preferred method and schedule for feeding. And that is okay! It is a surprisingly easy process that is more forgiving than you think. You just need time and patience.
But after reading through the steps, you might be wondering ‘why go to all of the trouble to create and maintain a starter in the first place?’ First off, it’s the most natural way to leaven baked goods and has been done this way for centuries – no commercial yeast necessary. Also, according to Chad one of the most important reasons is that it “improves flavor, adding complexity and acidity” to your breads. Think of a loaf of your favorite sourdough bread, with its perfectly creamy and chewy interior, slight tangy flavor and beautiful golden brown, crispy crust. But a starter can also be used to amp up the flavor of pastries, cakes and even tortillas and pasta. The bonus is that fermented foods are easier to digest and have better nutritional value as well.

"I love the daily rhythm of feeding a starter."
Chad Robertson
Bread Book
Photo credit: ©Liz Barclay
How to Make Your Own Starter
With just two ingredients needed to create a starter (and just four ingredients to make bread), it’s important to use the best quality ingredients you can find. Chad recommends seeking out a local or regional mill for freshly milled high-extraction flour (which is what he uses at Tartine). If you can’t find one near you, he has long partnered with Cairnspring Mills which ships nationally. Or you can also just use a 50/50 ratio of bread flour and whole wheat flour as well.
There are a lot of variables with a starter, and that is the fun part of the process. So rather than looking at a clock or calendar, Chad says to get familiar with your starter by using your senses – how your starter looks, smells, tastes and feels are the best indicators to know when it’s ready to use for baking. Here is his method for making your own starter at home, as noted in Bread Book:
Establishing a Starter
- Place 300g of warm water (80°F - 85°F) in a large glass or plastic container that is at least 2 quarts.
- Add 300g high-extraction flour, or 150g each of bread flour and whole wheat flour. Stir until combined and no dry spots remain, and the consistency is like pancake batter.
- Cover the container loosely with a towel (or with the lid slightly askew).
- Let stand at room temperature until bubbles form and the mixture starts to smell tangy. According to Chad, “this can take as few as 24 hours and up to 5 days” and is highly dependent on the ambient temperature of your house.
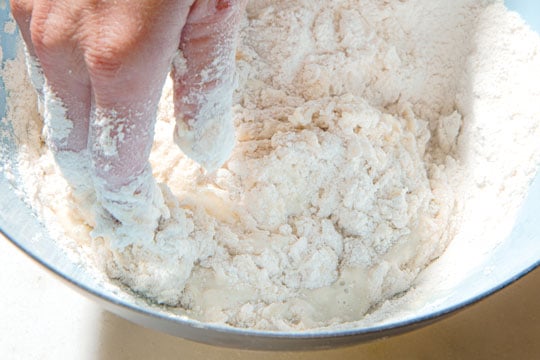
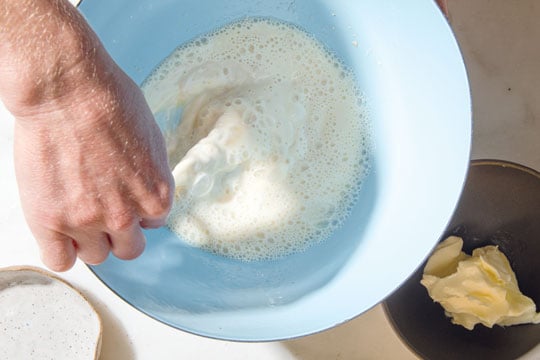
Photo credit: ©Liz Barclay
Feeding and Maintaining a Starter
- Remove 30g of the starter and place in a clean container. Discard the remaining starter.
- Add 150g high-extraction flour (or 75g each of bread flour and whole wheat flour) and 150g of warm water (80°F - 85°F). Stir until combined and no dry spots remain. Again, it should have the consistency of pancake batter.
- Cover the container loosely with a towel (or with the lid slightly askew), and let stand at room temperature.
- Repeat the feeding process once every 24 hours, ideally at the same time each day.
- After a few days, the starter should start to rise and fall more consistently between feedings. Also, the smell should change from “earthy and grainy” to “pleasantly fermented (like yogurt)”. This could take a few days or up to a few weeks.
- At this point, the starter can be used to make the ‘leaven’ that will go into your favorite sourdough recipe.
Use the Starter to Make the Leaven
- Two days before you want to bake bread, feed the starter twice each day – once in the morning and again in the evening.
- On the day you want to bake bread, use your starter to make the leaven.
- Remove 120g of the starter and place in a large mixing bowl. Add 300g flour and 300g warm water (86°F - 90°F) and stir to combine.
- Set the bowl in a warm place and allow to ripen until the leaven reaches 85°F, about 2 hours. Use the float test to determine if the leaven is ready: pinch off about 1 tablespoon of the starter and place it in a small bowl of cold water. If it floats, the leaven is ready to be used.
- Note that for some of Chad’s recipes in Bread Book, like his Country Bread, he adds a booster feeding prior to the main feeding noted above. This gives the bread the signature flavor and texture similar to the bread at Tartine.