In a large bowl, whisk together the flour and salt. Add the cubed butter, tossing the cubes through the flour until each individual piece is well coated. ‘Cut’ the butter into the flour by pressing the pieces between your fingers, flattening the cubes into big shards. As you work, continue to toss the butter through the flour, recoating the shingled pieces.
For a flaky crust, continue cutting the butter into the flour just until the pieces of butter are about the size of walnut halves. Or, for a mealy crust, continue to work the mixture together until the pieces of butter are about the size of peas. Alternatively, you can mix the butter in more fully to create dough that works well for decor.
Make a well in the center of the flour mixture. Add 1/4 cup water to the well, but have more on hand. Use a tossing motion with your hands to start to mix the two together (this begins to combine them without creating too much gluten). As it begins to become hydrated, you can start to use more of a kneading motion – but don’t overdo it: this will make the dough tough. Add more water about 1 tablespoon at a time until the dough is properly hydrated: it should be uniformly combined and hold together easily, but it won’t look totally smooth. Dough that is too dry may have sort of a “dusty” appearance, or pockets of un-hydrated flour. It will not hold together and will appear crumbly. Dough that is too wet will feel sticky or tacky to the touch, and is often smoother and/or lighter in color.
Form the dough into an even disk (or into another shape if directed by the recipe – or if you are multiplying the recipe to make multiple crusts, divide the dough appropriately). Wrap tightly in plastic wrap and refrigerate for at least 30 minutes and up to 3 days.
To Add Folds to the Dough: On a lightly floured surface, roll out the chilled dough to 1/2 in/1 cm thick. Brush away any excess flour, then gently fold the dough in quarters. Chill the dough for 15 minutes to 1 hour before using or adding more folds. 1-2 folds is ideal for my “Extra Flaky” method, and 4 folds works beautifully to create Rough Puff Pastry.
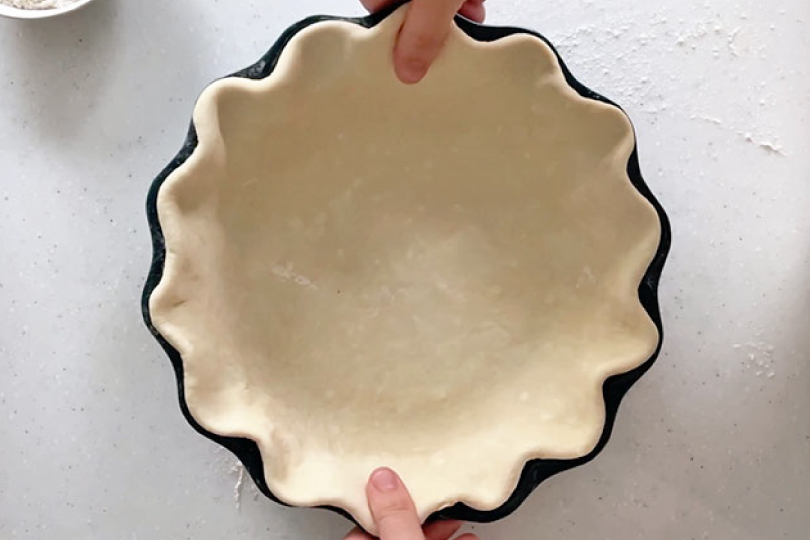
To Roll Out the Dough to Assemble the Pie: Lightly dust a work surface with flour, and lightly dust a rolling pin, if desired. Roll out the dough to about 1/4 inch thick, rotating it as you work to help prevent it from sticking. To transfer the dough to the pan, gently roll it up, wrapping it around the pin, then unfurl it into the pie plate.
To Prepare the Edge for Crimping: On a single crust pie, use scissors to trim away the excess dough, leaving about 1/2 inch excess all the way around the outside edge of the pie plate. Tuck this excess dough under, pressing gently to make it flush with the edge of the pie plate. On a double crust pie, gently press the top and bottom crust together to flatten the dough slightly, then trim the excess and tuck under ss directed for a single crust pie.
To Par-Bake the Dough: Dock the crimped single crust pie dough with a fork and chill well (at least 30 minutes). Cut a square of parchment paper slightly larger than the diameter of a pie plate, and press it into the base of the pie plate. Fill with pie weights to the top inner rim of the pie plate. Bake in a 425°F oven until the edges begin to lightly brown, about 15-17 minutes. Remove the parchment paper and pie weights, and return to the oven until the lower portion of the crust appears dry and set, 2-3 minutes more. Cool completely before filling.
To Blind-Bake the Dough: Follow the instructions for par-baking, but bake until it is fully golden brown. After removing the pie weights, bake for 5-7 minutes. Cool completely before filling.